Showing posts with label recipe. Show all posts

Thursday, February 28, 2008

Tofu Challenge: Lemon Pepper Pasta


I think that this Lemon Pepper Baked Tofu is my favorite Fresh Tofu variety. The flavor is light and crisp with a little bite, and like all of Fresh Tofu's baked varieties, the texture is sublimely dense.

The subtleties of this lemon and pepper tofu can get lost in some dishes, so I usually eat it as simply as possible. Diced into tiny cubes, it's perfect for a lightly dressed salad, where the taste can shine. For dinner, they blend perfectly in lemon pepper pasta.

I use a pretty basic and quick recipe; the ingredients are simple and it's easy to time everything to finish up at once. That, combined with a barely one-dollar-per-serving price, this dish could easily find it's way into your weekly menu plan.


Lemon Pepper Tofu and Pasta
serves 6

1 lb. angel hair pasta
1/4 cup plus 1 tablespoon olive oil
1 1/2 lemons
1/3 cup chopped parsley
2 teaspoons plus a dash black pepper
1 teaspoon kosher salt
Lemon zest for garnish
Parsley for garnish
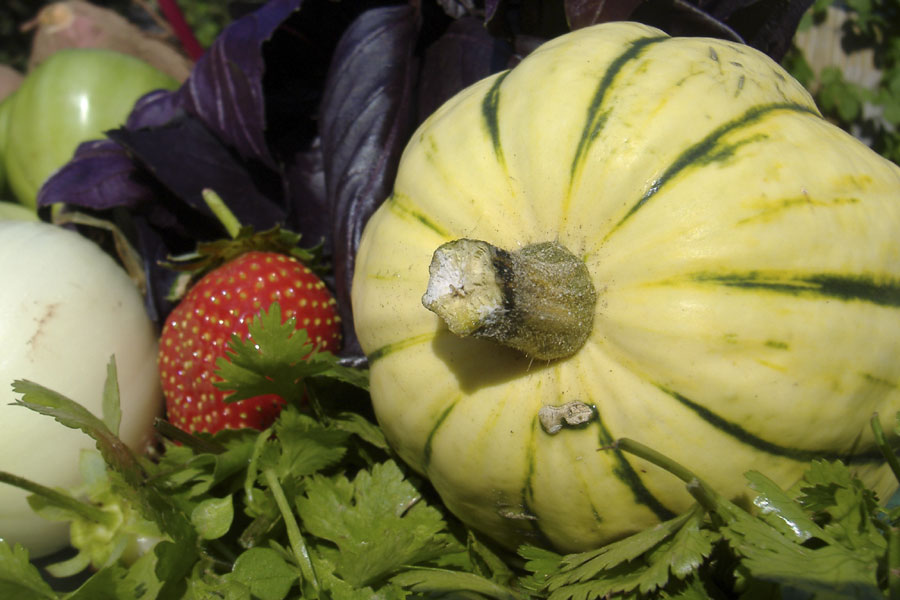
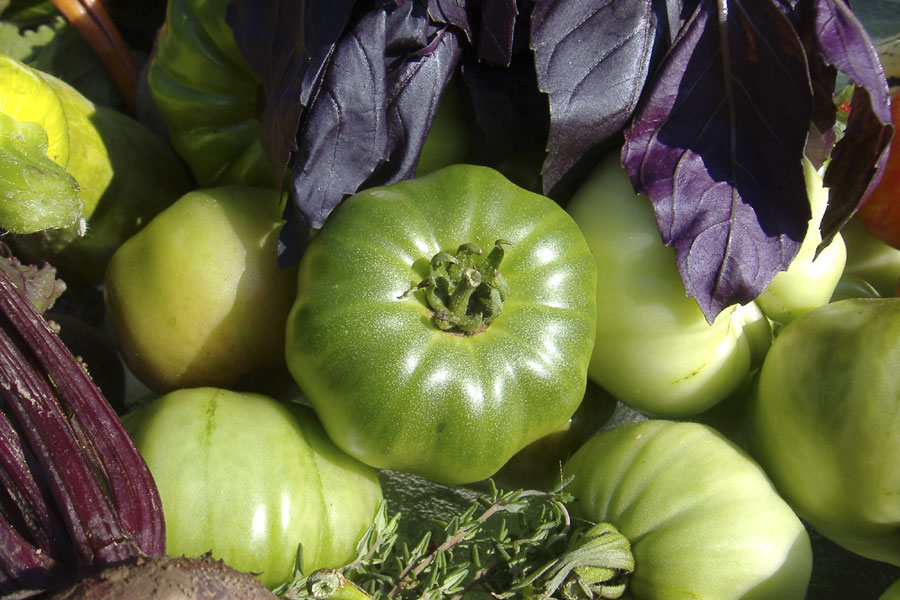
Cut lemon pepper tofu into 1/4" cubes. Heat tablespoon of oil in a frying pan, add tofu and sprinkle with a dash of pepper. Allow to brown over medium/high heat, tossing often. Right before removing from heat, squeeze juice of 1/2 lemon into pan, toss and cook for 30 to 60 seconds. Keep warm.

Meanwhile, bring a large pot of water to a boil. Add pasta and cook for three to five minutes, or until done; drain.

In a small bowl, combine 1/4 cup olive oil, juice of one lemon, parsley and black pepper; stir well. Toss with pasta.

Serve pasta with tofu cubes on top, garnish with parsley and lemon zest, pepper and salt to taste. Serve hot or cold.
Many lemon pepper pasta recipes call for basil rather than parsley, which I plan on trying this summer when the basil comes in from our CSA or garden. I'd also love to try this tofu over VeganYumYum's spicy lemon pepper fettuccine or with this lemon pepper cous-cous. Any non-local veggies you find in lemon pepper recipes could easily be replaced with seasonal ones. Except of course for the lemon. Maybe Nicole's Tuscarora Organic Growers Co-op will come through with some lemony citrus for us?

And now, all this light and airy lemon pepper herb talk has got me jonesing for spring something fierce. Drool!

Posted for:


> Cross-posted at www.farmtophilly.com.

Wednesday, January 02, 2008

Spiced blueberry pancakes


Over the holiday break, my son had a friend who, last time he was over, I promised blueberry pancakes for breakfast. The blueberries I had on hand were of the preserved Delaware Valley College grown organic sort. Lucky us!

During the spring and summer weeks, I usually make it to The Market at DelVal College once every week or two to stock up on locally-grown fruits and veggies. Although some of what I purchase on these trips supplements my CSA produce for meals, I mostly go with a mission to find foods that I will preserve. Berries and peppers are ridiculously easy to freeze, so often I'll search for them first.

Choosing foods that are easy to put up makes the weekly chore of preservation simple and fast. Of course, simple and fast means that my chances of burning out halfway through the season are lessened. I like the efficiency of this system :)


The blueberries I used for the boys' pancakes were purchased in June, on sale for $2.99 for two pints. Taking them out of the freezer, I remembered just what a fabulous idea it was to stock up on six pints of these organic, locally-grown dark blue lovelies. They were absolutely divine, literally bursting with flavor inside the piping-hot pancakes.


Spiced Blueberry Pancakes
Serves 4 (eight pancakes)

1 1/4 cups flour
2 teaspoons baking powder
1/2 teaspoon salt
1 teaspoon cinnamon
1 teaspoon nutmeg
2 tablespoons canola or safflower oil (plus some for pan)
1/3 cup water
1 cup plain rice or soy milk
1 teaspoon vanilla extract
2 tablespoons real maple syrup (plus some for serving)
1/2 - 3/4 cup blueberries (plus some for serving)

Mix dry ingredients together in a large bowl. Reserving the berries, add all other remaining ingredients in a separate bowl. Add to the wet mixture to the dry mixture, taking care to not overmix. Let batter sit for ten minutes. Stir in berries. Using a ladle, pour scoops of batter into a preheated, well oiled pan or skillet. When the pancakes start to bubble (about three or four minutes, depending on their size), flip and fry the other side for a minute or two. Stack pancakes and top with all natural maple syrup and whole blueberries.
In my kitchen, making pancakes is reserved for the less-scheduled and less-rushed weekend mornings. I usually double or triple the recipe however, so we can eat homemade pancakes during the next couple school/work days. You know, that way we at least have the illusion of calm and leisurely mornings. Enjoy!

> Cross-posted at www.farmtophilly.com.

Wednesday, December 12, 2007

Fresh Tofu Scrambler


Every good vegetarian has a recipe for a tofu scramble tucked in her or his apron. It's probably one of the very first dishes a new vegetarian learns to prepare, and puts to rest any misgivings one has about not liking tofu. My first introduction was about 17 years ago in a dinner lovingly prepared by mom using a Fantastic Foods mix and served on English muffins. A meal that is now one of my all-time comfort foods.

It's one of those perfect, reliable eats - a dependable friend during meal planning. Always there for you, like lasagna or a stir fry, willing to use up any veggies you need to move out of the crisper; always a complete source of nutrition and whole foods; always willing to be brunch (with toast), dinner (in a tortilla), a snack or anything in between; and, thanks to Fresh Tofu, always ready to show of its local flavor.


One of my favorite discoveries during One Local Summer, Fresh Tofu has been supplying the east coast with organic tofu since 1984 and is distributed throughout New York, New Jersey and Pennsylvania. I purchase mine at a local natural food store (Plumsteadville Natural Foods), though Whole Foods carries it as well. It truly is a superior product, living up to its name and consistently giving great texture and taste to my favorite bean curd recipes. If the gourmet mecca that is Horizon's uses Fresh Tofu, you can safely bank on it awesomeness. Besides, anyone with a flying block of tofu for a logo has got to pretty much rock, right?

Although creating and perfecting a great tofu scramble recipe is one of those must-experience kitchen intimacies, everyone needs a place to start. Vegan cookbook author extraordinaire, Isa Chandra Moskowitz's, version is a great place to do so and provides the base for my recipe below. Her spice combination is so colorful and the flavor can't be beat. If you're not vegan or vegetarian, that shouldn't stop you from honing your scramble skills. In fact, one of my favorite versions is a cilantro-heavy one made by an omnivore friend.

Tofu Scrambler
serves 4

1 pound organic Fresh Tofu, drained and pressed well
1 tablespoon olive oil
1 medium chopped onion
1 cup mushrooms, thinly sliced
4 cloves garlic, minced
1 cup chopped kale (or other dark, leafy green)
1/2 cup chopped peppers, carrots, and/or any other veggie in the fridge

1/4 cup nutritional yeast
hot sauce to taste

spice blend:
3 teaspoons cumin
1 1/2 teaspoon thyme
2 teaspoon paprika
1 teaspoon tumeric
1 teaspoon salt

Heat oil in skillet over medium-high. Saute onions 3 minutes, until softened. Add mushrooms, saute 5 minutes more. Add garlic, saute 2 minutes more. Add spice blend and mix it up for 15 seconds or so. Crumble in tofu and mix well. Let cook for about 15 minutes, stirring occasionally and adding splashes of water if necessary to keep it from sticking too much.

Mix in kale and other vegetables, cover for five minutes, allowing steam to soften them. Stir in hot sauce to taste. Mix in nutritional yeast.

Serve with toast (Bakers on Broad Complet bread was used above) and fruit for breakfast, or in tortillas with guacamole and salsa for dinner.

Although this is my standard recipe, it's really more of an outline. I can't say I've actually ever made the same scrambler twice. Everyone seems to find their own special ingredient, whether it be a spice or veggie or secret sauce, so don't be afraid to experiment!

> Cross-posted at www.farmtophilly.com.

Friday, November 23, 2007

Savory Smashed Sweet Potatoes

Local vegan for Thanksgiving: so good! That's because I've been hoarding sweet potatoes and shallots from my CSA share since September.


I found that the most efficient way to deal with the abundance of produce each week was to preserve whatever preserved easiest, so more often than not, each week's potatoes and onions were put in the dark. My stockpile of sweet potatoes and shallots finally met the light of day on Thanksgiving morning as Jason and I created a smash for our vegan dinner with friends later that night.

While pulling the recipe together, my only objective was to stear clear of the traditional sugary and sticky sweet potato recipes. One of the most valuable lessons eating locally has taught me, is that simply is the very best way to cook and enjoy vegetables. Local food just tastes better; there's little reason to doctor it up with loads of other ingredients. Think I'm overstating? Do a test of your own. A bite of local sweet potato vs. a bite of store-bought sweet potato. No contest. Be sure to note the incredible color difference while you're at it, too!

Additionally, always considering a local vegan diet when preparing meals, things like marshmallows and white sugar don't please either side. In avoiding a lot of ingredients, shallots and thyme seemed like a great way to impart a bit of simple savory loveliness into our dish.


Savory Smashed Sweet Potatoes
Serves 8

4 pounds of sweet potatoes, scrubbed, unpeeled and quartered (Blooming Glen Farm CSA crop share - 5 miles)
1/4 pound of shallots, chopped (Blooming Glen)
1 tablespoon dried thyme, crushed (Blooming Glen)
1 tablespoon olive oil (not local)
1 tablespoon kosher salt (not local)
1/2 cup soy milk (from Westsoy - 91 miles)
1/4 cup vegan buttery spread (from Earth Balance - 117 miles)

Add sweet potatoes to boiling stockpot and cook for 15 minutes or until tender. While the potatoes are cooking, heat oil in a pan over medium heat. Add shallots and thyme to the oil and cook five minutes or until soft and fragrant. Drain potatoes, score skins (so they don't get caught in your masher) and smash. Stir in two-thirds of the shallot mixture, soy milk and Earth Balance. Serve with shallots and thyme mixture sprinkled on top.
On top of being delicious, the simple ingredients mean super quick preparation. We had this in a serving dish and packed up in under 30 minutes. Maybe I should have started this post with "Local vegan for Thanksgiving: so good, so fast and so easy!"

> Cross-posted at www.farmtophilly.com.

Thursday, October 18, 2007

A peck of pickled... cucumbers!

To supplement my garden and CSA tomatoes for canning, I bought a box of tomatoes from the Shoemaker's road side stand.

A side note here, that the link will take you to the Shoemaker's machine shop. The family has run their welding and machining business and lived on Leidy Road since the 1950's. It's been as long as I can remember that they've sold their garden crops out front. Out here in the 'burbs, among all the McMansions and age-restricted townhome developments, there are occasional glimpses of realness that reflect the area's agricultural, small town roots. The several front yard road side stands in town are probably my favorite of those reflections :)

While I was there, I couldn't pass up a few delicious-looking cucumbers. I don't usually see cukes so late in the season, and my mouth was watering at the thought of a crispy cucumber sandwich.


Shortly after, when my tomatoes and I headed over to my dad's for canning, I was surprised with a bunch of local kirby cucumbers. Thanks pops, but yikes - what to do with them all? Naturally, pickles seemed out best option, though neither of us have preserved them before.

Thank goodness for the Pickle Preservation Society (seriously, who knew?!). They have several recipes on their site, and I copied the one we used below. We went with an easy, traditional kosher recipe that required no hot-packing, and also one that utilized local ingredients we had on hand. The recipe called for dill and garlic, which I received in my CSA share that week (though the dill was not flowering as the recipe recommends). Man, I just love it when things work out like that!


Kosher Pickles: The Right Way
From Mark Bittman, New York Times

1/2 cup kosher salt
1 cup boiling water
2 pounds small Kirby cucumbers, washed, and cut into halves or quarters
5 cloves or more garlic, peeled and smashed
1 large bunch dill, if desired, fresh and with flowers OR 2 tablespoons dried dill and 1 teaspoon dill seeds, OR a tablesoon of coriander seeds

1. In a large bowl*, combine the salt and boiling water; stir to dissolve the salt. Add a handful of ice cubes to cool down the mixture, then add all remaining ingredients.

2. Add cold water to cover. Use a plate slightly smaller than the diameter of the bowl and a small weight to hold the cucumbers under the water. Keep at room temperature.

3. Begin sampling the cucumbers after 2 hours if they are quartered, 4 hours if they are halved. In either case, it will probably take from 12 to 24 hours, or even 48 hours, for them to taste "pickly" enough to suit your taste. When they are, refrigerate them, still in the brine. The pickles will continue to forment as they sit, more quickly at room temperature, more slowly in the refrigerator.

Yield: About 30 pickle quarters.
*We went with pickling in one of those giant industrial-food-sized jars instead of bowls. We tried the bowls, the jar was just way easier to manage.

These turned out quite garlicky, so next time we'd probably use only three or four cloves. I can totally see how people get into making their own "special recipe" pickles. With slight adjustments to so many different and easy-to-find ingredients (garlic, hot pepper, peppercorns, mustard seed, onion, celery, sugar), there are endless taste possibilities. This is definitely a project we'll be doing again next season!

> Cross-posted at www.farmtophilly.com.

Sunday, March 04, 2007

12 Step burrito


My recent favorite local foodie stop is Xinantecatl, a Mexican grocery and grill a couple blocks from the house. I usually stop in to pick up plantains and avocados, and we really love their veggie burritos. Even without the beans (they're cooked in lard), the burritos are super filling, have a great texture and are quite delicious.

Lately though, Jason's fondness of the Xinantecatl veggie burrito has slowly shifted from general admiration to uncontrollable addiction. He's obsessed. He schedules appointments only after considering where a Xinantecatl stop will figure into his plans, and he shamelessly buys burritos for friends and family members in an effort to get them "turned on" to the "rice and veggie high, man." He's out of hand.

Out. Of hand.

He thought long and hard about his addiction, how it's influencing his decisions and effecting his relationships. And by "long and hard," I mean 4.2 seconds. His very thoughtful solution was, rather than working the 12 steps to overcome his ungodly desires to consume the burrito ("that's a lot like work"), to become a burrito super chef in his own right. Meh, he's getting older you know, the fight's just not worth it anymore.

JASON'S F THE 12 STEPS BURRITO
Serves: Two bigguns'
2 whole wheat tortillas
1/2 can refried beans
1 cup cooked quinoa (add Bragg's to water when cooking)
1 cup cheese/not cheese
1 handful shredded spinach
1 handful diced tomatoes
1/2 handful chopped radishes
1/2 handful shredded purple cabbage
a bit of diced onion (like a third of an onion)
1 diced avocado
1 diced jalepeno
fresh cilantro leaves
spices like chili powder, ground cumin, chipolte powder
salt and pepper
salsa, hot sauce and sour cream to taste

Preheat oven to 400 degrees. Add beans to small pot and heat, stirring in spices, salt, pepper and/or salsa to desired taste; keep warm. Sprinkle cheese/not cheese onto tortillas and place in oven until melted (about four or five minutes). Remove tortillas from oven, add a layer of beans, a layer of quinoa and then distribute the veggies and cilantro. Add salsa, hot sauce and/or sour cream. Roll (or not) and serve with a plastic duck. And fruit - we used mango above.
I'm actually glad he decided to stay on the burrito. His version is health-ified (whole wheat instead of flour tortilla, quinoa instead of rice, spinach instead of lettuce), but still Xinantecatl yummy with their signature crunch (thanks, radishes!).

Thursday, February 15, 2007

Snow Day!

Finally! A snow day!

Except it was more of an ice day, so no sledding... but there was soup!

ALKALINE VEGETABLE + BARLEY CURRY SOUP
Serves: 12
6-quart stock pot with lids
3 tbs olive oil
2 onions, chopped
2 cups dark leafy greens, chopped (I used a frozen Blooming Glen mixture of carrot greens, kale and swiss chard)
8 cloves garlic, minced
1 to 1 1/2 cups pearled barley (use more for a thicker stew)
32 ounces butternut squash soup (I use Imagine brand)
5 scrubbed, but unpeeled* carrots, diced or sliced into discs
5 scrubbed, but unpeeled* parsnips, diced or sliced into discs
1 rutabaga diced - if there's wax on the skin, peel it off, otherwise just scrub it clean
5 stalks of celery, diced (I use the leafy parts, too)
4+ tablespoons of curry powder (spice it up to taste)

*Most of the nutrients in root vegetables live close to the surface; by peeling them you'll inadvertently loose the good stuff.

Heat the oil over medium heat. Add onions and cook until softened (about five minutes). Add the garlic, greens and half of the curry powder; saute for about 30 seconds. Stir in barley and soup Bring soup to a boil. Reduce heat to low, skim off any froth, cover and simmer for 20 minutes.

Add root veggie loveliness, celery and remaining curry powder. Cover and simmer 20 to 25 minutes more, or until barley and vegetables are tender; add water if necessary. I served this with Dave's Own Pumpernickel bread (shipped from RI by Grandma G.).

We had such a great day hanging out together. I wish everyday could be like this :)

AC ventured outside while I was making soup.


After lunch, we built the best Lego army base EVER.


Clearly, Cinder was too busy to play in the snow, cook soup or build an army base.


No school, no work... just family time, cooking, building, playing and finishing the day up with cuddle puddle on the couch while watching Totoro (one the best movies ever created).

Yeah, man :)

Wednesday, November 22, 2006

Spaghetti Squash

I saw this recipe for Spaghetti Squash with Garden Vegetables from the Eat to Live newsletter online last month and immediately bookmarked the page. When I saw spaghetti squash at the Del Val Market a couple weeks ago, I knew just what I was going to do with it!

I almost didn't post this because the photo is poor, but the dinner was so good that I had to :)

This meal turned out to be a great family-cooking recipe; Avery, Jason and I all prepared and cooked it together. We followed the recipe almost exactly, just adding more vegetables (like extra Blooming Glen cabbage - yum!) and some crushed red pepper. We also microwaved the squash instead of baking it (pierce five or six holes in the skin and cook five to ten minutes rotating a few times, until the squash gives slightly when touched). It's yummy served with parmesan not-cheese, or a parmesan-like topping.

SPAGHETTI SQUASH WITH GARDEN VEGETABLES
(From Oct. 06 Eat to Live recipe of the month)
Serves: 6
1 medium spaghetti squash
1 1/2 diagonally sliced carrots
1/2 cup diagonally sliced celery
3 cloves garlic, minced
1 1/2 cups shredded cabbage
1 small zucchini, chopped into small pieces
1 16-ounce can pinto beans, no or low salt, drained
1 14-ounce chopped tomatoes, no salt, drained
1/3 cup apple juice
1 teaspoon dried thyme
1 teaspoon dried parsley
1/2 teaspoon garlic powder
1 cup garlic pasta sauce

Preheat oven to 350 degrees. Slice spaghetti squash in half lengthwise; remove seeds. Place both halves upside down on a baking sheet. Bake for 45 minutes. Meanwhile, cook carrots and celery in 2 tablespoons of water in a covered pan over medium heat for 10 minutes, stirring occasionally. Add a little more water if needed.

Add garlic, cabbage, and zucchini and cook, covered, for another 10 minutes.
Stir in rest of ingredients, except for pasta sauce, cover and simmer for 10 minutes or until carrots are tender.

When squash is done remove from oven and, using a fork, scrape spaghetti-like strands from squash into a bowl. Add pasta sauce and combine by mixing thoroughly. Mix the vegetables, beans & herbs with the squash/pasta sauce mixture and serve on a bed of romaine lettuce or place back in the hollowed out squash bowls.

Thursday, November 09, 2006

Rooot Sooop


We had a ton of Blooming Glen root veggies in the fridge. Thankfully it's chilly enough to make a yummy "root soop." I made a gigantic batch on purpose. This is unusual.

I swear, I had twelve children in a previous life. Most times, although I have the intention to make one pot, it always ends up as two. When I chop the carrots, I think to myself, "oh, I'll throw a couple extra in." Then, when I add the beans, I think, "hmm, this will be a little more substantial if I add extra." Naturally, extra celery, parsnips, rutabaga follow. Of course, there's always something in the fridge that "should really be used up," so I add that, too. Before you know it, I'm in a panic on the phone with my mom, looking for another pot, because mine is overflowing. And I've only got through half of the ingredients.

I can't tell you the countless times I've done this. You think I would have learned by now, but without fail, every time I make soup or chili, it's the same story. So, I've decided to start this season out different. I began this recipe with two pots. See? I can be trained :)

We had a ton of roots on hand - carrots, celeriac (celery root), rutabaga, parsnips. The above is the "after" picture, this is the "before" picture:


And here's the recipe (adapted from a December - I think - 2005 Vegetarian Times recipe):

ROOT SOOP WITH BARLEY
Serves: like, a bazillion

2 6-quart stock pots with lids
3 tbs olive oil
4 leeks, chopped
2 onions, chopped
8 cloves garlic, minced
1 cup pearled barley
3 32-ounce boxes of organic vegetable stock (or 12 cups of water and 4 bullion cubes)
8 - 10 cups of scrubbed, but unpeeled* diced root veggie loveliness
1/2 - 1 cup of chopped fresh herbs (dill works well, but any one or two will work)

*Except the celeriac. Go ahead and peel those gnarly, dirty bad boys. Most of the nutrients in root vegetables live close to the surface; by peeling them you'll inadvertently loose the good stuff.

In one of the pots, heat the oil over medium heat. Add leeks and onions and cook until softened (about five minutes). Add the garlic and saute for about 30 seconds. Remove half of the mixture and place it into another pot, over medium heat. Stir half of the barley into pot one, the other half into pot two. Do the same for the vegetable stock. Bring soup to a boil. Reduce heat to low, skim off any froth, cover and simmer for 20 minutes.

Add root veggie loveliness; half in one pot, half in the other. Cover and simmer 20 to 25 minutes more, or until barley and vegetables are tender. Just before serving, stir in herbs. Salt and pepper to taste.

We had bowls of soup with some fantabulous grilled not-cheese sandwiches - made with Bakers on Broad complet bread, of course ;) Yummm!

Thursday, October 12, 2006

Sexxxy Focaccia

Bow chica bow wow...

It's been far too long...

I need some focaccia porn up in here...

Aw yeah.

Jenn came over the other night to work on our window project (it's a work in progress, just like me), and we needed a snack to sustain us through the creative process. I had picked up a "blank" focaccia from Bakers on Broad earlier that day and when I did, the owner Linda went into the back (read: her house) and cut off a slab of some maytag blue cheese she got from a friend. I paired the bread and cheese with apples from Del Val , leeks from Blooming Glen and rosemary from our garden.

I preheated the oven and sliced up the cheese, apples and leeks. I use some the green parts of leeks too; it seems unfortunate to toss the lovely greens into the compost. I lightly sauteed the leeks and apples (maybe five minutes), adding a dash of black pepper.


After lightly oiling the bread crust, I layered cheese first, then apples, then leeks, and sprinkled rosemary on top. I baked it for about 15 minutes at 375 degrees.


So sexxxy.

:)

Wednesday, October 04, 2006

Veg*n Lasagna even Garfield would love!


Oh, yumminess comfort food :)

Veg*n Lasagna
Serves 12!

olive oil
1 chopped onion
3 cloves chopped garlic (we always use more)
1 cup chopped tomatoes
2 cups chopped fresh seasonal (local) vegetables
1 jar or can of tomato paste
1 jar of tomato sauce (homemade if you got it!)
1 - 2 cups TVP, depending on how thick you you like your sauce
2 boxes of organic whole wheat lasagna noodles (I used Hodgson Mill's)
2 containers of extra firm tofu, pressed and drained
1 - 2 handfuls of chopped fresh garden herbs (this time, I used basil, chives, cilantro, rosemary)
2 packages of shredded veggie cheese (mozzarella and/or cheddar)
salt
pepper

Sauce:
Chop and saute onion and garlic in a bit of olive oil, until onions are translucent and soft. Add veggies and stir fry/steam until soft (about 10 minutes). Stir in tomato sauce, tomato paste and TVP. Lightly simmer, covered, about 10 to 30 minutes, adding water as needed.

Noodles:
Cook lasagna noodles according to package directions. I usually cook them about 3 or 4 minutes less than the box instructions so they they hold up better while baking.

Filling:
Combine tofu with fresh herbs, one package of shredded cheese and salt and pepper to taste. I use my hands to smoosh everything together. I suppose you could use a food processor, but that'll just leave you with more dishes to wash :) Add salt and pepper to taste.

Assembly:
Place a layer of noodles in the bottom of a 13x9 baking dish, add one-third of the sauce, another layer of noodles, then half of the cheese mixture. Repeat. Finish with a layer of noodles and sauce on top.

Here, you can either refrigerate or freeze for future use (or for giving to the neighbors who just had a baby/surgery/breakdown), or bake it for immediate consumption :)

Bake:
Cover and bake at 375 degrees for 25 minutes. Uncover, spread remaining package of shredded cheese on top of lasagna and bake until melted (5 to 10 minutes).

Thursday, September 28, 2006

Veg*n French Toast and Fruit

So, I've had Jenny's vegan french toast recipe linked forever. Well, actually, since July when she posted it, but whatever.

The point is that we finally made it :) Jason made some for a weekend breakfast, and lucky for us there was batter left over for another couple breakfasts. Eating french toast on a weekday morning felt so decadent.

In addition to being veg*an, this breakfast was very local, as well. The bread was complet from Bakers on Broad, the peaches grown at and bought from the Del Val Market and the strawberries from our Blooming Glen CSA crop share.

This recipe will definitely make it into our brunch repertoire, except maybe next time we'll follow the directions more carefully. As in, maybe we will use two TEAspoons of cinnamon rather than two TABLEspons :P

Tuesday, September 26, 2006

CSA crop share 19


You'll be surprised by whom the Blooming Glen CSA bootie is brought to you by this week... See below :)


It's the hampie poo! :D While we (Brookie, Avery and I) were unloading the produce for photographs, Avery grabbed his hamster for a roll around the yard in his super duper glow in the dark ball. Isn't he the sweetest?


Avery's all, "Yoh, gimme my hamster back, Auntie Brooke." "Dood hamster is chillin' in the sun man, relax."

Anyway.... Yeah, EIGHT POUNDS of green heirloom tomatoes. Apparently, they're done ripening for the season. Tricia the farmer provided us with a Green Tomato Relish recipe in this week's newsletter. We haven't tried it yet, but I I had to post it now for two reasons: One, just in case any of you could use it ('tis the season, you know), and two, because it's Tricia's grandma's recipe (too special to wait):

Nanny’s Green Tomato Relish
* This makes a huge batch for canning. We got over 10 pint jars. You could easily cut in half, or in third for eating fresh.
1 peck green tomatoes (roughly 20apple size)
6 large onions
6 green peppers
6 red peppers
Put through chopper and drain.

Syrup:
3 pints sugar
3 pints vinegar
1 T whole cloves, in cloth or tea ball
1 stick cinnamon
Boil quite awhile (20 min.?), remove cinnamon stick and cloves. Pour over relish.

Add:
1 T Salt
1 T celery see
1 T mustard see
Boil 20 mins.

Process in boiling water canner for 15 min.


Let us know if you try the recipe - or, share any other green tomato recipes that you have! :)

Monday, September 25, 2006

Dinner for two


A recent dinner for Jason and me: Yummy nachos featuring local organic tomatoes, spring onions and poblano peppers (all from Blooming Glen), piled on a bed of organic blue corn chips, veggie chili and veggie cheese, topped with black olives and hot sauce.
  • Heat chili.
  • Layer chips on a oven-safe plate.
  • Add chili to chips, top with cheese and bake at 400 degrees until cheese melts (10 - 15 minutes).
  • Dice/chop/gather your choice of veggies such as peppers, tomatoes, onions, lettuce, corn, olives, avocado, etc.
  • Add veggies to chips and top with your favorite hot sauce or salsa.
This is totally what I had in mind when I was about 13 and daydreaming about having my own place where I could do anything I wanted - even eat junk food for dinner!

Thursday, September 14, 2006

Roasted Veggie Macaroni

A rain cancelled football practice last week meant that we had some time to actually cook dinner - and together, to boot!

Now... what to cook?

Of course, we had on hand plenty of fresh local vegetables. We also had some time to cook, but only about an hour. And, we wanted to make a dish that we could all create together. This is the lovely local (from Blooming Glen and our own garden) and organic produce we had on hand:

Cafe Cyan's CSA newsletter listed a Roasted Vegetable Pasta dish that I had bookmarked earlier in the week and it seemed like a perfect fit :) Thanks Crystal and Ryan (and your CSA farm)!

Fresh Tomato Sauce

1 (6-oz.) can tomato paste
1/2 cup chopped onion
Salt and pepper
3 cups chopped tomatoes (any variety)
3 or more cloves fresh garlic, chopped
Herbs such as oregano, thyme, parsley and basil, to taste
Splash of balsamic vinegar
Honey or other sweetener as desired

Add tomatoes and garlic. Simmer until sauce reaches desired consistency, about 20 minutes. Sauté onions in 2 tablespoons olive oil in a large skillet over medium heat until onions are translucent. Add tomato paste at the end, along with herbs and vinegar. If sauce is too tart, add a spoonful of sweetener. Lightly simmer 10 minutes longer to let flavors meld together.

Roasted Vegetables
1 large green pepper, chopped

1 large
red pepper, chopped
1
eggplant, diced
1 onion, chopped

3-4 cloves garlic,
sliced
Fresh herbs such as basil, thyme, oregano, parsley, sage and rosemary
1 yellow squash

1 zucchini
1 jalapeno
Olive oil to coat


Mix vegetables, herbs, garlic, and onion in a bowl and lightly coat mixture with olive oil, salt and pepper. Place in a large (or a couple large) roasting pans coated with olive oil. Roas
t for 20 minutes at 400 degrees or until veggies are soft, but not burned. Toss vegetables occasionally as needed. Combine the Fresh Tomato Sauce and Roasted Vegetables and serve over pasta.

Avery and I chooped the veggies we had on hand (carrots, yellow sweet pepper, skinny red sweet pepper, OKRA!, jalepeno) and roasted them while Jason made the sauce. We cooked some whole wheat macaroni and sliced some yellow watermellon from the previous week's Bloomin Glen crop share for dessert :)


Garnished with our own garden rosemary. Yummm, yummm!

Thursday, August 31, 2006

Pennypacker Farm, the other CSA

Our friends Justin and Kelly (not that Justin and Kelly) belongs to the Pennypack Farm in Horsham. The farm, actually called Pennypack Farm Education Center for Sustainable Food Systems, was was established in 2003 by an 11-member Board of Directors, and is a registered 501(c)3 non profit educational organization. Their mission is to:

"Increase public understanding of the health, economic, ecological and social issues involved in sustainable local food systems. We work with individuals, families, communities, environmental and educational institutions to raise awareness about sustainable local food systems by offering educational programs and a community supported agriculture (CSA) demonstration project."

Which in part means, that they put together and host some super awesome classes. Classes like, Food Preservation Workshop (Drying/Freezing). Although Kelly's been pretty keen on "playing things by ear" lately, and I cherish my Sunday afternoons, she signed us up for the one hour Sunday session. And, I'm really, really glad we actually made it there :)

The workshop was run by farm member and food preserver extraordinaire, Jo Ping. JP has that certain earth mother vibe every food preservationist needs, but it's uniquely infused with just enough bespectacled scientist to make you pay close attention and take notes when she's speaking. See how she's got her hands on her hips? Yes, ma'am! :)


JP walked the group of eight through the basics of storage, pickling, freezing and jarring seasonal produce to last through the fall and winter months. Some gems I picked up from the session:
  • Go ahead and freeze herbs, there is no benefit to drying them. Chop and place into plastic freezer bags, then tear off pieces as you need them.
  • When freezing basil toss the stems, but when freezing parsley, use the stems.
  • Always filter tap water that you use for pickling and jarring. The chlorine in tap water can deter the fermenting process needed for these types of preservation.
  • Use sea salt or kosher salt when pickling, it just does a better job.
  • When blanching veggies for freezing, retain the water for soup stock.
  • Yes kids, you really need to blanch before freezing. See how they turn pretty, bright colors when you do that? That's a good thing.
  • The best veggies for pickling are anything firm; radish, kohlrabi, carrots, eggplant, cabbage, broccoli stems.
  • Jarring tomato pulp seems to preserve more flavor than freezing it.
The best part of the class though, was JP sharing her Kim Chee recipe:

Cut in half, one head of nappa or Chinese cabbage. Hint: to reduce loose pieces, cut only through the stem, then tear the halves apart. Then quarter halves. Rub leach leaf with salt, using about three tablespoons per quarter. Place cabbage into a lidded plastic or glass container (not metal because the salt will corrode it), to let leaves soften, anywhere from one to five hours. Meanwhile, mix the following in a bowl to form a paste:

* one grated carrot
* one julienned green onion
* two TBS of sugar
* three cloves of garlic
* one TBS of ginger
* two TBS of hot pepper powder

Remove quarters and rinse off the salt in clean, cooled boiled water. Paint the mixture onto each cabbage leaf, place back into container, cover and store on counter top for two days. Then, place into refrigerator and store up to two months - although, it is best eaten sooner :) Serve with a protein (barbecue tempeh or chicken, fried egg) and steamed rice.

Of course, I'll post here when I tackle the Kim Chee. If you have the chance, check out the other classes offered by Pennypack farm - I highly recommend them :)

Pennypack Farm: http://www.pennypackfarm.org/joomla/index.php