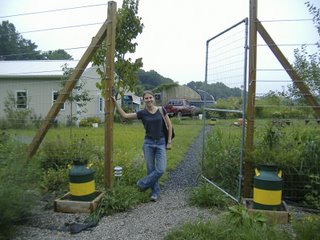
 Our friends Justin and Kelly (not that Justin and Kelly) belongs to the Pennypack Farm in Horsham. The farm, actually called Pennypack Farm Education Center for Sustainable Food Systems, was was established in 2003 by an 11-member Board of Directors, and is a registered 501(c)3 non profit educational organization. Their mission is to:
"Increase public understanding of the health, economic, ecological and social issues involved in sustainable local food systems. We work with individuals, families, communities, environmental and educational institutions to raise awareness about sustainable local food systems by offering educational programs and a community supported agriculture (CSA) demonstration project."
Which in part means, that they put together and host some super awesome classes. Classes like, Food Preservation Workshop (Drying/Freezing). Although Kelly's been pretty keen on "playing things by ear" lately, and I cherish my Sunday afternoons, she signed us up for the one hour Sunday session. And, I'm really, really glad we actually made it there :)
The workshop was run by farm member and food preserver extraordinaire, Jo Ping. JP has that certain earth mother vibe every food preservationist needs, but it's uniquely infused with just enough bespectacled scientist to make you pay close attention and take notes when she's speaking. See how she's got her hands on her hips? Yes, ma'am! :)
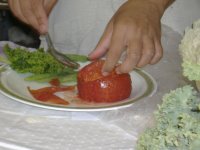
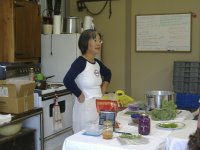

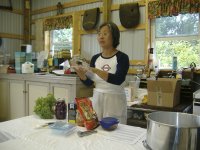
JP walked the group of eight through the basics of storage, pickling, freezing and jarring seasonal produce to last through the fall and winter months. Some gems I picked up from the session:
- Go ahead and freeze herbs, there is no benefit to drying them. Chop and place into plastic freezer bags, then tear off pieces as you need them.
- When freezing basil toss the stems, but when freezing parsley, use the stems.
- Always filter tap water that you use for pickling and jarring. The chlorine in tap water can deter the fermenting process needed for these types of preservation.
- Use sea salt or kosher salt when pickling, it just does a better job.
- When blanching veggies for freezing, retain the water for soup stock.
- Yes kids, you really need to blanch before freezing. See how they turn pretty, bright colors when you do that? That's a good thing.
- The best veggies for pickling are anything firm; radish, kohlrabi, carrots, eggplant, cabbage, broccoli stems.
- Jarring tomato pulp seems to preserve more flavor than freezing it.
Cut in half, one head of nappa or Chinese cabbage. Hint: to reduce loose pieces, cut only through the stem, then tear the halves apart. Then quarter halves. Rub leach leaf with salt, using about three tablespoons per quarter. Place cabbage into a lidded plastic or glass container (not metal because the salt will corrode it), to let leaves soften, anywhere from one to five hours. Meanwhile, mix the following in a bowl to form a paste:
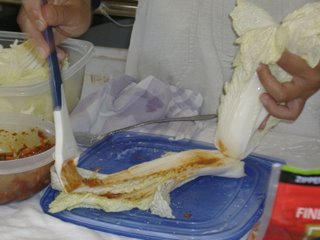 * one grated carrot
* one julienned green onion
* two TBS of sugar
* three cloves of garlic
* one TBS of ginger
* two TBS of hot pepper powder
Remove quarters and rinse off the salt in clean, cooled boiled water. Paint the mixture onto each cabbage leaf, place back into container, cover and store on counter top for two days. Then, place into refrigerator and store up to two months - although, it is best eaten sooner :) Serve with a protein (barbecue tempeh or chicken, fried egg) and steamed rice.
Of course, I'll post here when I tackle the Kim Chee. If you have the chance, check out the other classes offered by Pennypack farm - I highly recommend them :)
Pennypack Farm: http://www.pennypackfarm.org/joomla/index.php


4 comments:
cool! filtered water when you are actually using a fermented type of pickle recipe. I make alot of pickles, but they are the quick vinegar kind... tap water works for these.
Those are some incredible tips!
dude, JP is wearing a london underground shirt. she pretty much rules in my book.
oh yea, and she teaches some cool tricks, too.
That sounds like an awesome class you went to. Thanks so much for posting those helpful tips you learned :) Kim Chee is one of those foods I've only heard about but never eaten. Of course, anything spicy and pickled has to be tasty!
Post a Comment